Presets for Lightroom — FLTR
- 4.6
- Rating
- 10.00M
- Installs
- Free
- Price

 Analysis by App-foxy
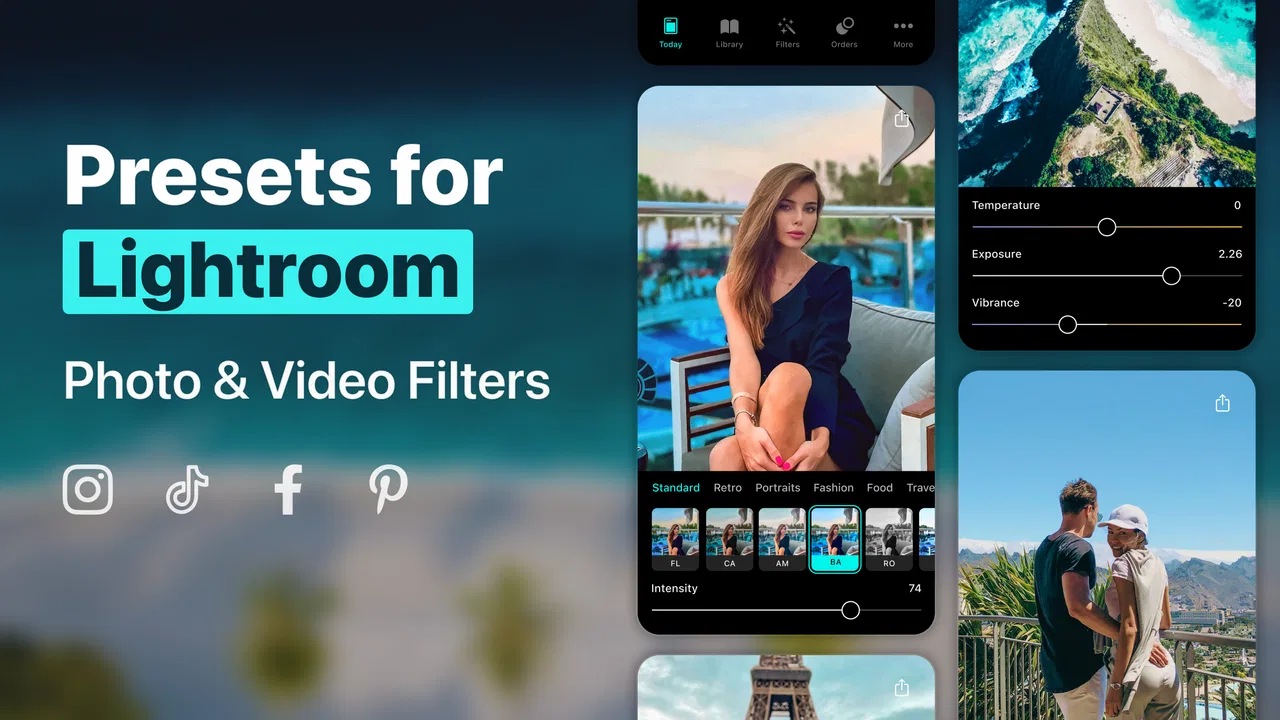
I opened Presets for Lightroom — FLTR expecting a quick way to give ordinary phone photos a more consistent look, and that is still the best way to understand it. This is a free photography app from Mobile Presets & Filters, aimed at people who want Lightroom-style presets and filters without building every edit from scratch. I would not treat it as a complete replacement for Lightroom, but I found it useful as a starting point between an untouched camera roll and a finished social post.
The app is listed as FLTR, and its focus is straightforward: browse a visual treatment, apply it to a photo, then decide whether the result needs extra adjustment elsewhere. That workflow matters because presets are not magic corrections. They can establish mood and consistency, but the original lighting, skin tones, colors, and exposure still determine whether the final image looks polished or overprocessed.
From an ordinary photo to a usable final edit
I find it useful to treat the first preset as a visual starting point, then pause before making it the final look. In this section, I’ll focus on the small checks that help a quick edit hold up across different photos, especially when lighting and skin tones vary. That leads into the next question: what happens when a casual edit turns into a longer session with a whole batch to review?
You May Also Like

 Blood Strike: 2.5 Anniversary
Blood Strike’s Loadouts Turn Every Drop Into a Tactical Gamble
A close look at Blood Strike’s custom loadouts: how fast access to signature weapons reshapes its battle royale rhythm, rewards preparation, and narrows the gap between fights.

 Pandora - Music & Podcasts
Pandora’s Music Is Easy to Start, but Harder to Recover
Pandora’s strength is its low-effort path from a seed to a station. Its weak spot is how much confidence it asks you to place in connection, setup, and quiet recovery.

 8 Ball Pool
 Is Built on Rivalries, Rematches, and Routine
A close look at the rivalries, rematches, shared routines, and unanswered safety questions that turn a quick pool match into a persistent mobile community.

 Samsung Music
’s Quiet Strength Is Playing What You Already Own
Its reach comes less from spectacle than from dependable access to a personal library. That simplicity is both the app’s strongest retention engine and its ceiling.

 AccuWeather: Weather Radar
AccuWeather Review: A Quick, Clear Forecast for Everyday Decisions
For everyday plans, the best forecast is the one you can understand quickly. AccuWeather makes rain timing, radar, and local conditions easy to act on, with a few trade-offs.

 Hill Climb Racing
Why Hill Climb Racing Still Turns Crashes Into One More Run
A tiny car, a bumpy hill and one more upgrade: Hill Climb Racing keeps resurfacing because its simple chaos makes every near-miss feel personal.
More From Our News Desk



Starting with the right photo
My first useful step was not choosing a filter. It was choosing an image that could actually benefit from one. A bright outdoor portrait, a café photo with warm light, and a group of travel pictures can all respond very differently to the same preset. FLTR is most helpful when I already know the visual direction I want: soft and warm, cooler and cleaner, more dramatic, or more suitable for a coordinated feed.
That makes the app a better fit for a batch of related photos than for a single image that needs serious repair. If a picture is badly underexposed, has distracting objects, or needs careful skin retouching, a preset will not solve the underlying problem. I prefer to correct the basic image first when possible, then use FLTR to shape the atmosphere.
A practical example is a weekend trip. I might return with indoor restaurant photos, bright street scenes, and sunset shots. Instead of applying one look blindly to everything, I would separate them into small groups. The restaurant images may need a warmer treatment, while the street photos may look better with a cleaner, less intense style. This simple sorting step prevents the common mistake of forcing unrelated lighting conditions into one visual formula.
Browsing without losing the original image
The browsing stage is where FLTR feels most approachable. Preset-based editing reduces the time spent moving sliders one by one, which is especially helpful when I am comparing several moods rather than trying to learn every Lightroom control. I can think in visual terms—muted, vivid, airy, cinematic—rather than starting with technical settings.
I recommend treating the first selection as a draft, not a final decision. A preview that looks attractive on one image may make another photo too orange, flatten shadows, or push blue areas into an unnatural shade. I usually compare the edited image with the original before committing. That quick check is more valuable than choosing the most dramatic preview.
One less obvious advantage of this approach is speed during a handoff. If someone asks me to prepare a few photos for a story or a small album, I can establish a shared direction quickly and spend my time refining exceptions. The preset handles the broad visual idea; my attention goes to the photos that do not fit it perfectly.
Making a preset behave on different lighting
The strongest workflow I found is to use the preset as a base layer in the creative sense, then judge each photo independently. A cloudy image may need more brightness after a muted look, while a sunlit portrait may need less intensity to keep the face natural. Even when the app offers an attractive one-tap result, I would not assume that identical treatment means identical quality.
This is also where users should manage expectations about Lightroom. FLTR is designed around presets and filters, so it can make a visual decision easier, but it does not replace the patience required for detailed editing. For precise color grading, local corrections, masking, object removal, or a carefully controlled professional workflow, I would move to Lightroom itself or another full editor. FLTR makes more sense when the creative starting point is the priority.
Preparing a consistent set instead of one impressive image
For social posts, consistency is often more important than maximum intensity. I found it better to choose one restrained look and apply it across a small set, then remove or soften the treatment on photos that react badly. A feed where every picture has a different color cast can feel less coherent than a set with modest edits.
There is a useful trade-off here. Strong presets can make a single image stand out, but they also reveal differences in lighting very quickly. Subtle treatments are less exciting during selection, yet they usually survive a mixed batch better. I would start with the gentler option, compare the whole group, and only then test a stronger style on the hero image.
Handoffs between FLTR and the rest of the process
FLTR works best as one stage in a larger routine. I might select a photo from the camera roll, use the app to establish the mood, inspect the result, and then send the image to a separate editor if it needs cropping, detailed correction, or text. That handoff is not a weakness by itself; it simply defines the app’s role.
The important friction is deciding where the finished file should live and which version is the master. I recommend keeping the original untouched and treating the FLTR result as an edited copy. If I am preparing images for different destinations, I also avoid replacing the only original with a heavily filtered version. This makes it easier to change direction later instead of trying to undo an edit that no longer suits the project.
For a friend who wants a quick post, I would use this sequence: choose the clearest original, test two or three visual directions, compare the result at normal viewing size, and keep the least processed version that still gives the set a recognizable mood. Then I would pass the image to the destination app for its final crop or caption. That keeps FLTR focused on appearance rather than asking it to manage the entire publishing process.
What the result looks like in everyday use
When the source photo is already reasonably exposed, the result can feel immediate and satisfying. A flat image gains a clearer identity, and a group of photos can look as though they belong together. This is especially useful for casual creators who want a repeatable style but do not want to study every Lightroom adjustment before posting.
I also see value for small personal projects: a travel recap, a family event, a menu of homemade dishes, or a set of product photos for a local seller. The app can help establish a recognizable tone before the images move into a more demanding layout or publishing tool. In those situations, the time saved at the first editing stage is more important than having every possible advanced control in one place.
Still, the result depends heavily on restraint. Presets can amplify a photo’s existing problems. Warm indoor lighting may become too yellow, pale skin may lose its natural appearance, and dark areas may become muddy when contrast is pushed. I would always inspect faces, white objects, and shadow detail before sharing the final image. Those checks take seconds and prevent the most visible mistakes.
Who will appreciate it, and who should skip it
I think FLTR is a good match for beginners, social media users, travelers, and anyone who wants a recognizable look without starting from a blank editing panel. It is also useful for people who enjoy experimenting with mood but do not want to spend several minutes repeating the same adjustments across a group of photos.
It is less suitable for photographers who need exact control over every part of an image, or for anyone whose main requirement is advanced retouching rather than color and atmosphere. If your normal workflow includes detailed masking, precise batch synchronization, complex layers, or careful print preparation, a dedicated editor remains the better center of the process.
I would also be cautious if you dislike browsing through many stylistic options. Preset apps can encourage endless comparison, and the number of choices can become a distraction from the photograph itself. My advice is to decide the intended mood first, then limit the search to treatments that support it. Otherwise, the app can turn a quick edit into a long session of trying looks that do not serve the image.
Cost, access, and what to expect from the current app
The app is free to install, with in-app purchases ranging from $0.99 to $69.99 per item. That makes it easy to try the basic workflow before deciding whether paid content fits your editing habits. I would check the purchase screen carefully and think about how often I will actually use the available styles rather than buying simply because a preview looks attractive.
Its content rating is Everyone, so it is positioned for a broad audience. The app launched on June 25, 2019, and the current version is 4.22.0, with Android 10 as the minimum operating system. Those details matter if the app is being installed on an older phone or if a family member is using a device that has not been updated recently.
Public interest is substantial: FLTR has an average rating of 4.6 from around 419 thousand ratings and has passed 10 million installs. I see that as a useful sign that the preset-first approach appeals to many people, but it does not change the central limitation I noticed in use: a popular filter can still be the wrong choice for a particular photo.
Where the workflow breaks
The flow breaks when I expect one preset to handle every input. Mixed lighting, different camera profiles, and varied subjects make uniform treatment difficult. A preset that works beautifully on a landscape may be unflattering on a face, while a bright beach photo can become harsh under a look that suits an indoor scene.
Another breaking point is the gap between a quick visual effect and a finished image. If I need to remove distractions, repair a background, correct perspective, or make a precise local change, I have to continue elsewhere. FLTR can be the first handoff, but it should not be mistaken for the whole production line.
There is also a creative risk: relying on presets can make different photos feel interchangeable. I avoid that by using the same look as a starting point, then allowing small differences where the subject demands them. Consistency should support the story of a photo set, not erase the character of each image.
My recommendation after using the complete workflow
FLTR is most valuable as a fast visual starting point, not as a replacement for a full photo editor. I would recommend it to a friend who wants to move from unedited camera-roll images to attractive, coordinated photos with less effort. The best results come from choosing suitable source images, applying a restrained treatment, checking faces and shadows, and keeping the original available for later work.
If your priority is speed, mood, and a simple path from photo selection to a shareable result, this photography app earns a place in that workflow. If your priority is technical precision or advanced retouching, I would choose Lightroom or another comprehensive editor first and use preset browsing only as inspiration. In my experience, FLTR succeeds when I let it do one job well: help me find a coherent look quickly, then hand the image to the right tool for the final details.
FAQs for Presets for Lightroom — FLTR
01What is Presets for Lightroom — FLTR?
Presets for Lightroom — FLTR is a mobile-focused collection of photo presets designed for Adobe Lightroom users. It provides ready-made editing styles that can be applied to portraits, travel photos, food images, landscapes, and social media content. The app is mainly useful for users who want to achieve a consistent visual style without adjusting every Lightroom setting manually from scratch.
02How do I use FLTR presets in Adobe Lightroom?
After choosing a preset in FLTR, you generally need to download or import the preset file and then open it in Adobe Lightroom. Depending on the package, presets may be provided in formats such as DNG or XMP, and the installation process can differ between mobile and desktop versions. The app may include instructions, but users should expect a few manual steps before the presets appear in Lightroom.
03Is Presets for Lightroom — FLTR free to use?
FLTR may offer free presets or limited access at no cost, while additional collections, premium styles, or full preset packs can require an in-app purchase or subscription. Pricing and available content may change over time, so it is important to review the purchase screen carefully before confirming payment. Also check whether a subscription renews automatically and how cancellation works.
04Do FLTR presets work with every photo and Lightroom version?
Presets are not guaranteed to produce identical results on every image. Lighting, camera settings, skin tones, and the original colors of a photo can significantly affect the final appearance, so some adjustment is usually necessary after applying a preset. Compatibility can also depend on whether you use Lightroom Mobile, Lightroom Classic, or another Adobe version.
05Does FLTR require an internet connection or an Adobe Lightroom account?
An internet connection is normally needed to browse, download, or unlock preset collections, especially when the app uses online content or account-based purchases. Adobe Lightroom is also required to apply the presets properly, and some Lightroom features may depend on an Adobe account or paid plan. Once files are downloaded, certain editing steps may be possible offline, depending on the setup.
Pros
- Large preset library for different photography styles and moods.
- Quick one-tap edits can speed up everyday photo processing.
- Presets can be fine-tuned after applying them in Lightroom.
- Useful inspiration for discovering new color-grading ideas.
- Works well for users who want a consistent social media aesthetic.
Cons
- Some of the best preset collections require an additional purchase.
- Results may vary significantly depending on the original photo and lighting.
- The app may feel overwhelming because of its many preset categories.
- Advanced Lightroom users may find some effects too generic or dramatic.
- A Lightroom account and compatible app are needed to use the presets fully.

Presets for Lightroom — FLTR
Gallery